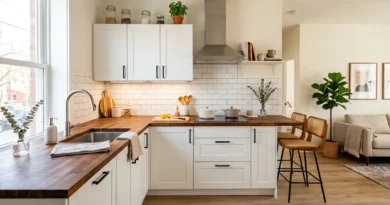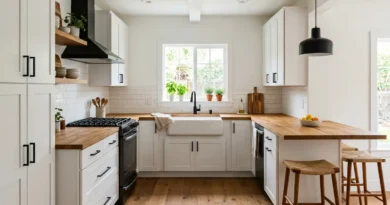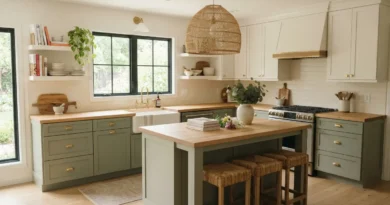
22 Creative Mini Kitchen Ideas to Maximize Small Spaces
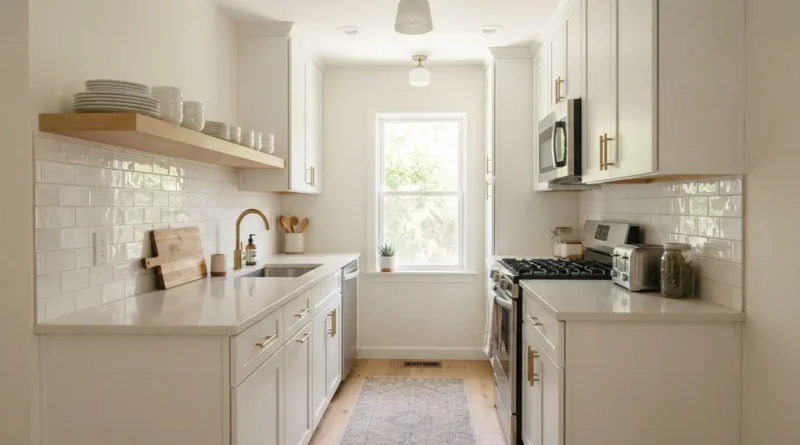
My first apartment kitchen was four feet wide. I could stand in the middle, stretch my arms out, and touch both walls. For a while I told myself I just had to live with it. Then I started moving things around, testing storage, and paying attention to what I actually used every day. That tiny kitchen ended up being the most organized one I have ever had. Small kitchens are not a problem to solve once and forget. They are a puzzle you slowly get better at. The ideas below are the ones that worked in real homes, not just in showrooms. Some cost almost nothing. Some take an afternoon and a screwdriver. All of them are things you can look at, copy, and adjust to fit your own walls. Start with one, live with it for a week, then add another.
1. Slim Rolling Cart
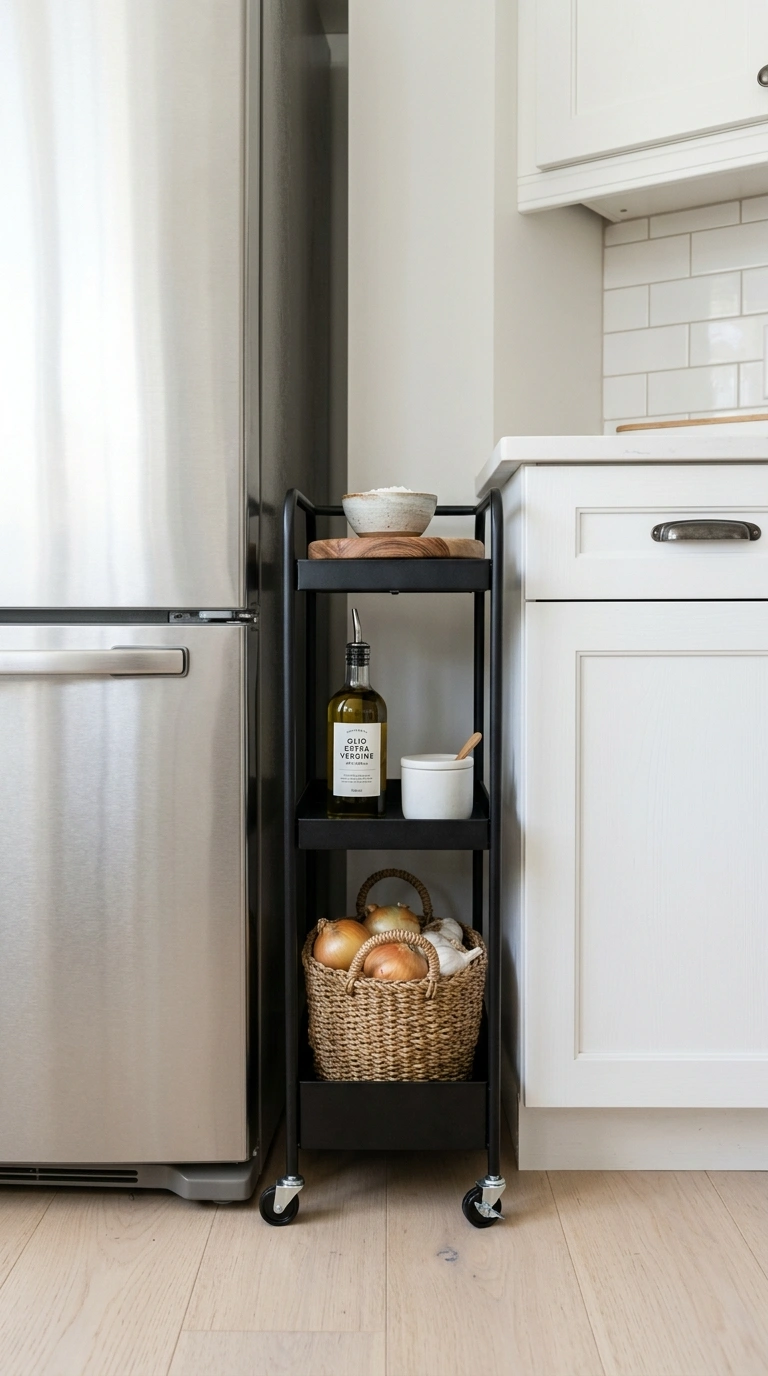
A narrow rolling cart is the easiest win in any mini kitchen because it gives you counter space that moves. Look for one that is around twelve to fifteen inches wide with two or three open shelves and locking wheels. Park it in the gap between your fridge and the wall, or tuck it under a window where cabinets could never go. The top shelf works as a landing spot when you are chopping. The middle holds oils, vinegar, and the salt you reach for constantly. The bottom is perfect for onions, potatoes, and garlic in open baskets so air can move around them. Metal carts in black or brushed steel look clean and wipe down fast. Wood topped carts feel warmer if your kitchen already has a lot of white. The trick is to keep it styled simply, five or six items you actually use, not fifteen. Roll it next to the stove while cooking, then push it back against the wall when you are done.
2. Open Wall Shelves
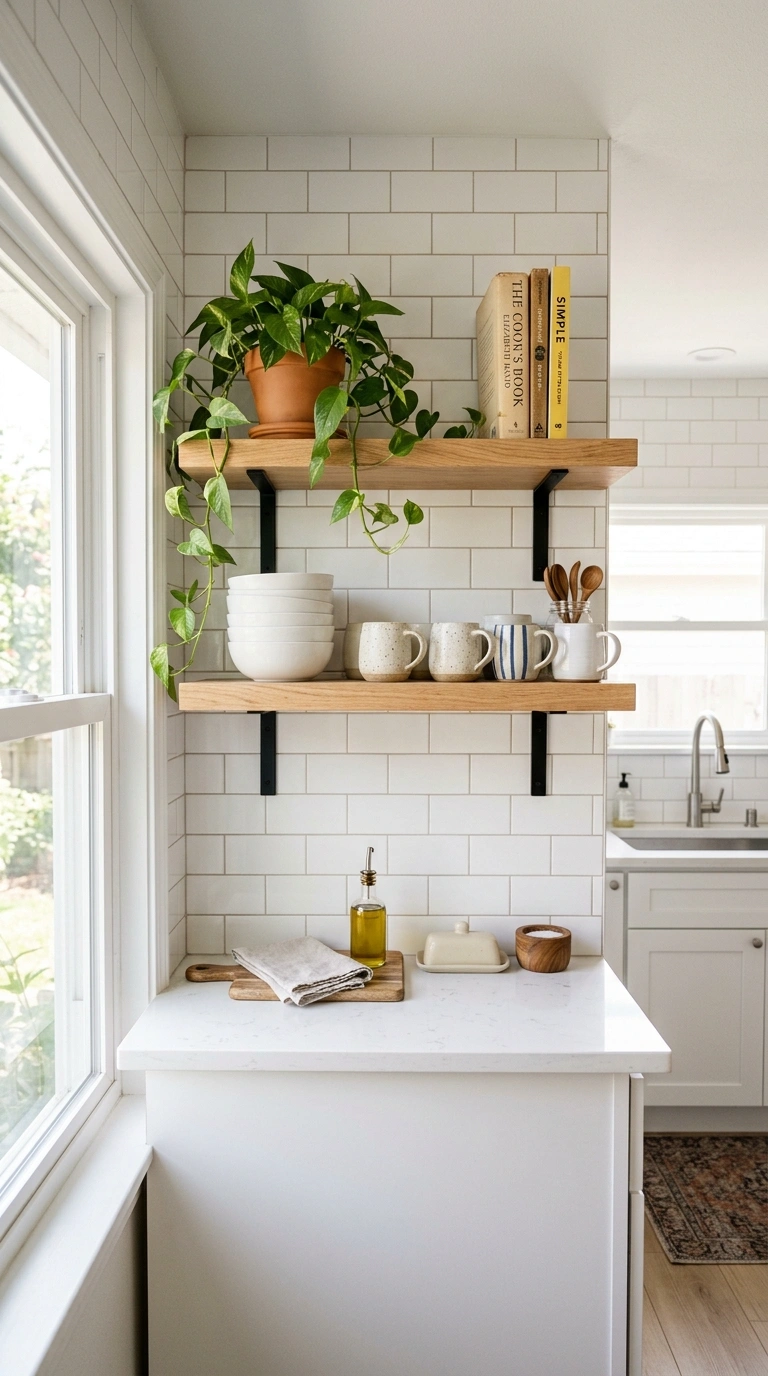
Swapping one upper cabinet for two open shelves makes a small kitchen breathe. Cabinets create a heavy block of wood at eye level, and in a narrow room that block is what makes walls feel close. Shelves let you see the wall behind them, and that little bit of visible paint or tile tricks your eye into reading the room as wider. Use solid wood boards around ten inches deep, mounted on simple black or brass brackets, and space them about fourteen inches apart so a tall glass jar still fits. Store the things you use daily, plates, mugs, bowls, in stacks that look tidy on purpose. Keep the color story tight. White dishes with two or three wood boards look calm. Mixed patterns look busy. If you worry about dust, put your everyday dishes on the lower shelf since constant use keeps them clean, and save the top shelf for a plant or a stack of cookbooks.
3. Under Cabinet Lighting
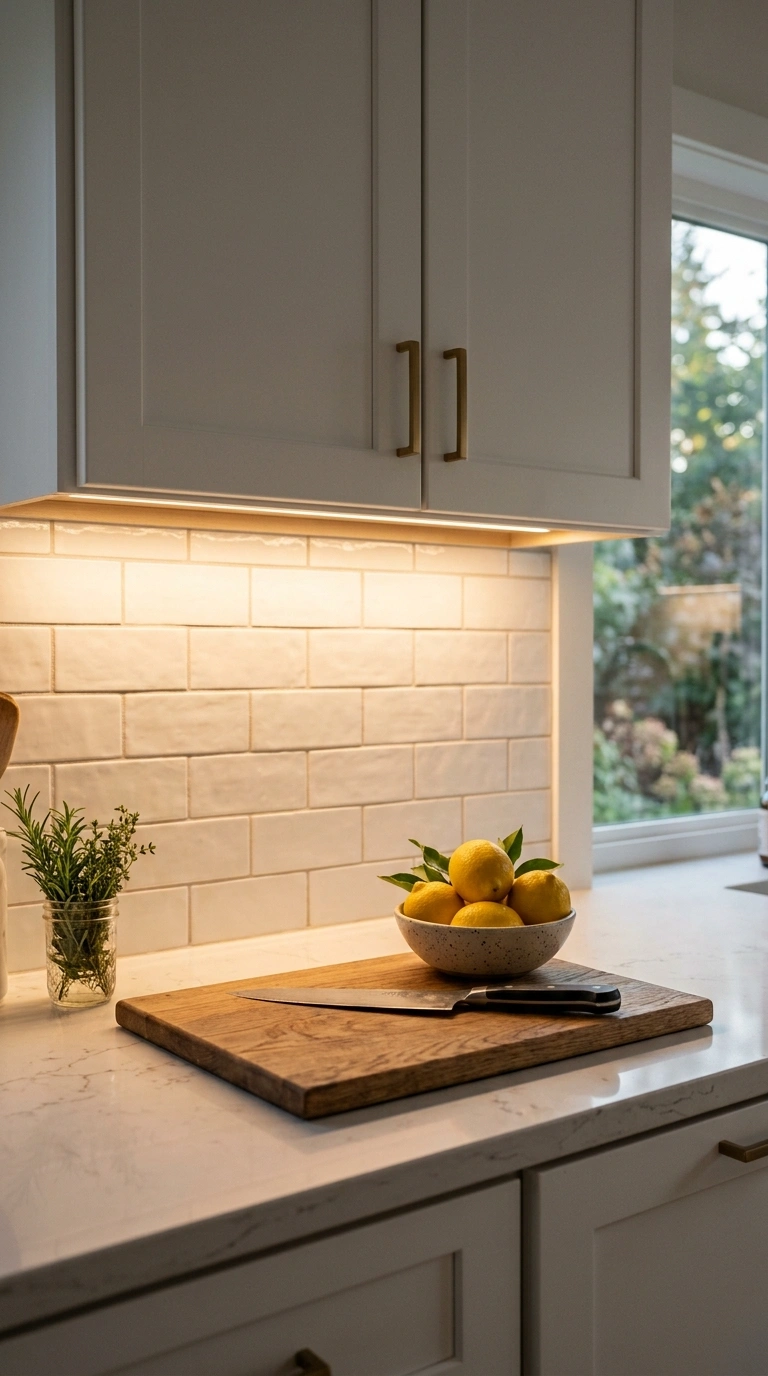
Bad lighting makes a small kitchen feel like a closet. A strip of warm LED light mounted under your upper cabinets changes that in about twenty minutes. Stick on rechargeable bars work if you rent and cannot drill. Plug in strips with an adhesive back are better if you have an outlet nearby, since you never have to recharge them. Choose a warm white bulb around 2700K to 3000K so your counters look soft instead of blue and clinical. Mount the strip toward the front edge of the cabinet bottom, not the back, so the light falls onto the counter instead of the backsplash. The difference is immediate. Your chopping area gets bright, your backsplash tile picks up a gentle glow, and the whole kitchen gains visual depth because you now have two layers of light instead of one ceiling bulb. If your strip comes with a dimmer, use it at night for a low, warm kitchen that still feels welcoming.
4. Fold Down Table
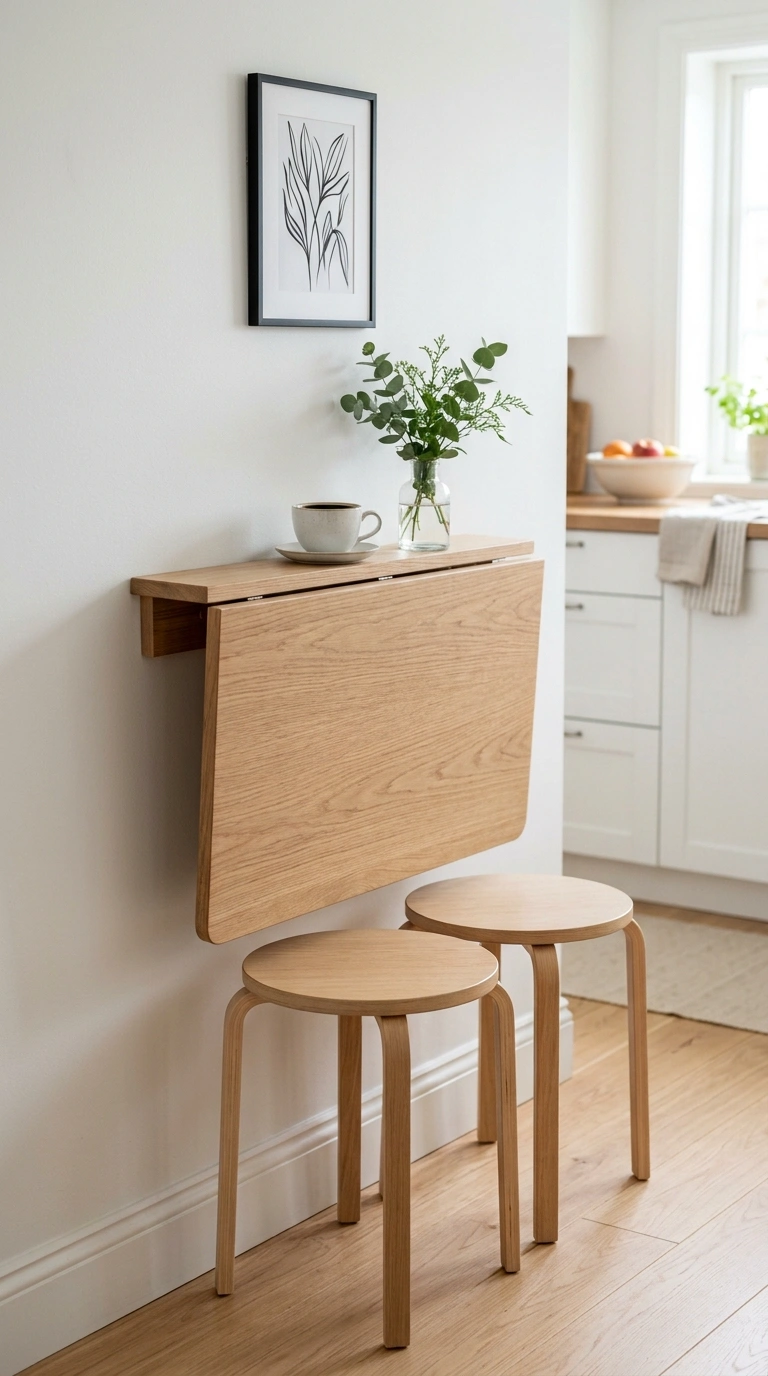
If your kitchen has no room for a table, a wall mounted fold down surface gives you one only when you need it. Mount a hinged wood leaf about thirty inches off the floor on the longest free wall, or on the side of a cabinet run. When folded up it sits flat against the wall, roughly two inches deep, and you barely notice it. When folded down it becomes a breakfast spot for two, a laptop desk, or extra prep space for rolling dough. Choose a solid wood leaf around thirty by twenty inches with a strong drop leaf bracket rated for real weight. Seal it with a food safe finish so spills wipe away. Pair it with two lightweight stools that slide underneath completely, or hang the stools on wall hooks nearby. To make it look intentional rather than temporary, paint the bracket the same color as your cabinet hardware and add a small framed print above it.
5. Magnetic Knife Strip
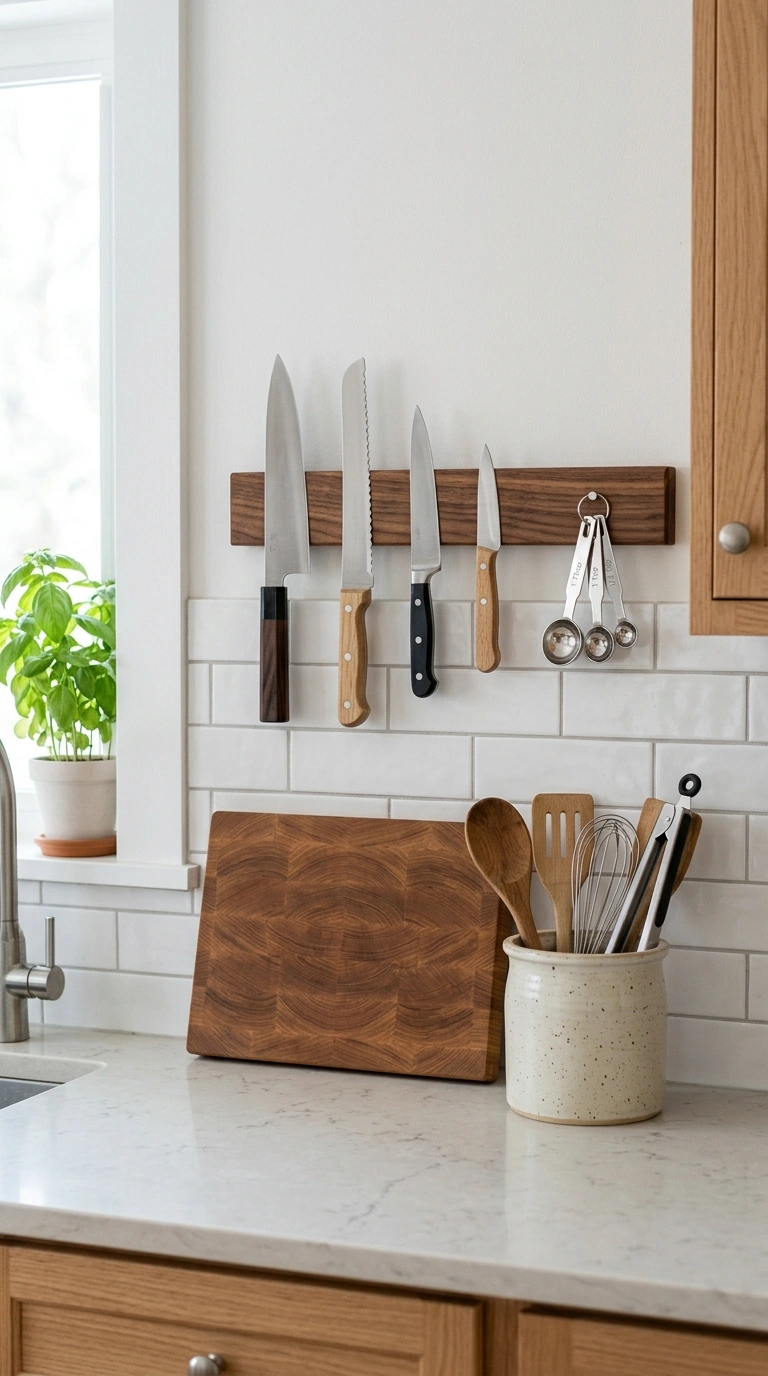
A knife block eats counter space that a small kitchen cannot spare. A magnetic strip mounted on the wall takes that whole footprint back. Install an eighteen inch strip about eighteen inches above the counter, close to your main chopping area but not directly above the sink where splashes land. Wood strips in walnut or oak look warm against white tile. Stainless steel strips suit a more modern kitchen. Beyond knives, the strip holds metal measuring spoons, a bench scraper, and small kitchen scissors, so it quietly replaces a whole drawer. Make sure you drill into a stud or use proper wall anchors, because a loaded strip carries real weight. Place your knives with blades pointing the same direction for a clean look, longest on one end, shortest on the other. If you have small children, mount the strip higher than they can reach or pick a different wall entirely. Wipe the strip down weekly along with the backsplash.
6. Compact Two Burner
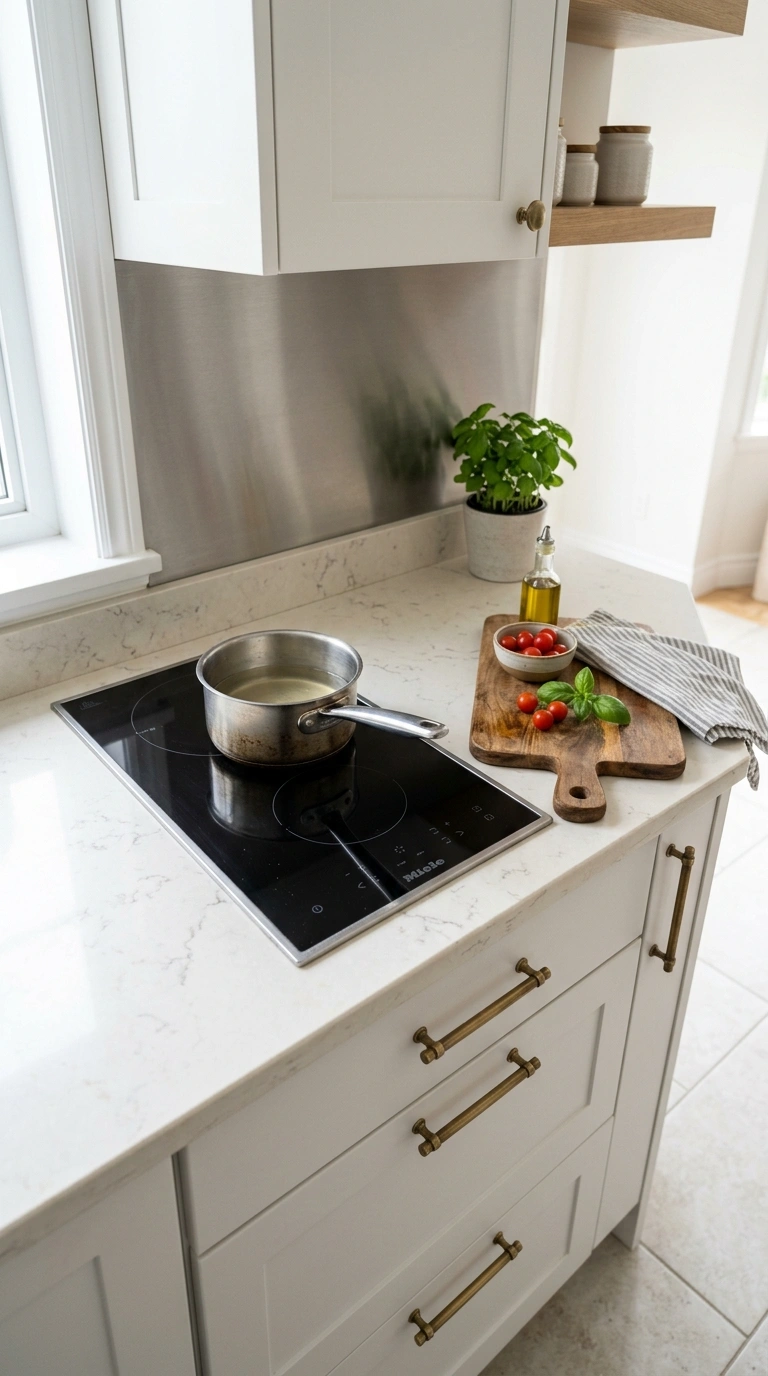
A full range is often more stove than a small kitchen needs. A two burner induction or gas cooktop, usually around twelve to twenty four inches wide, frees up a big chunk of counter. Induction models sit almost flush, so when they are off you can lay a wooden board over them and use that spot as prep space. Under the cooktop you gain room for a real drawer stack instead of an oven you rarely use. If you still bake, pair it with a countertop oven on a shelf or in a cabinet nook. For styling, choose a black glass cooktop against a light counter for contrast, and keep a small ceramic crock of utensils beside it rather than a large one. Add a simple stainless backsplash panel or a wipeable tile behind it. This setup suits studios, cabins, and garage apartments, and it makes the cooking zone feel deliberate instead of squeezed.
7. Vertical Pan Rack
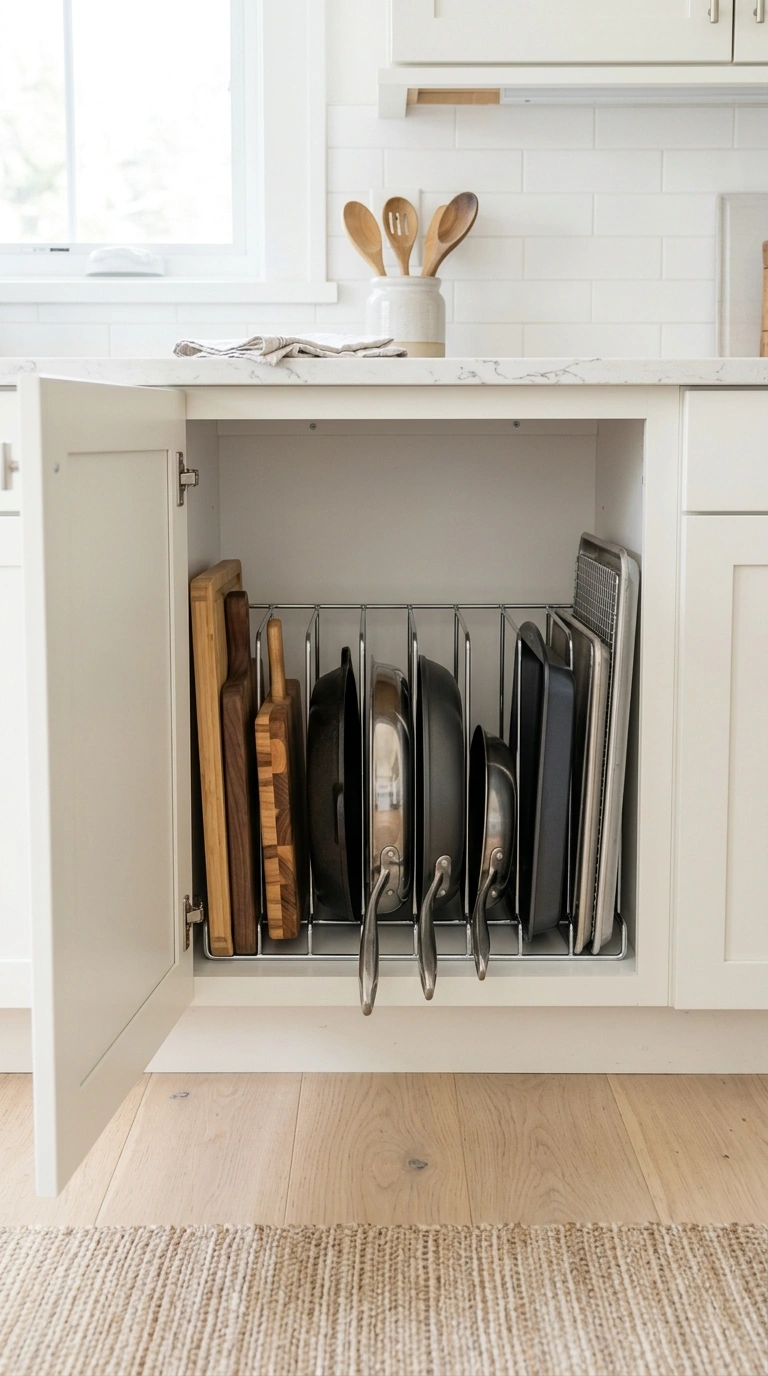
Stacking pans inside a cabinet means moving four things to reach one. Storing them upright fixes that. Buy a wire or wood vertical divider rack, slide it into a base cabinet, and stand your skillets, baking sheets, cutting boards, and pot lids on edge like books on a shelf. Everything is visible and you grab one piece without lifting the rest. Look for an adjustable rack so you can set wide slots for cast iron and narrow slots for cookie sheets. If your cabinet has a fixed shelf in the middle, remove it first so you get full height. For open storage, a slim vertical rack also works beside the fridge in a gap as narrow as six inches. Style it by keeping matching pan handles facing forward. This one takes about fifteen minutes to set up and it is the change most people say they notice every single day while cooking.
8. Corner Sink Setup
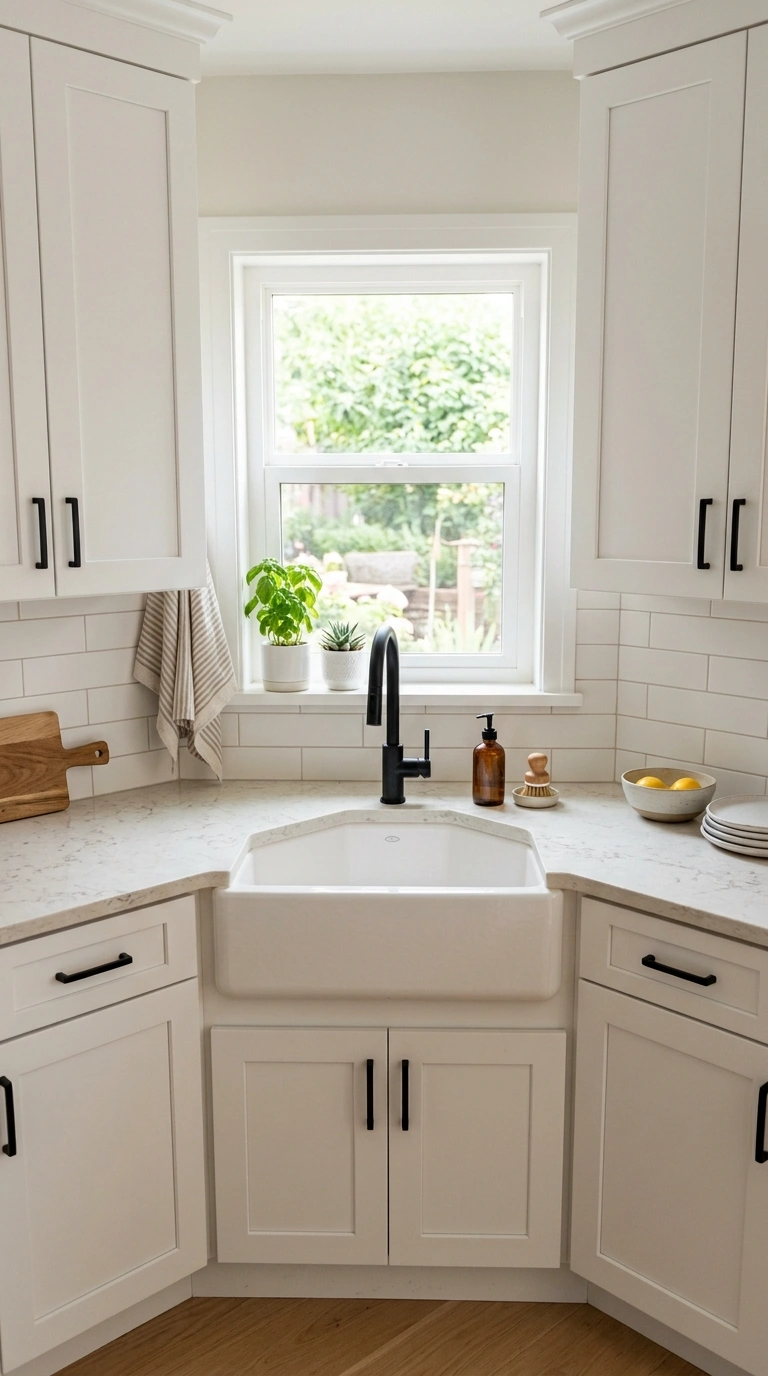
Corners are dead space in almost every small kitchen. Moving the sink into the corner opens up two long stretches of usable counter on either side instead of chopping one wall in half. A single bowl sink set at a slight angle in the corner works best, paired with a tall gooseneck faucet so you can still fill pots. Add a pull out corner base unit underneath, or a lazy susan, so the cabinet space does not go to waste. Keep the area around it clear, one soap dispenser, one small dish brush holder, nothing else. A light colored quartz or laminate counter makes the corner read as bright rather than shadowy. If your corner has a window above it, even better, since natural light lands right where you wash. This layout suits L shaped kitchens under eighty square feet and makes the room feel like it has two proper work zones.
9. Light Tile Backsplash
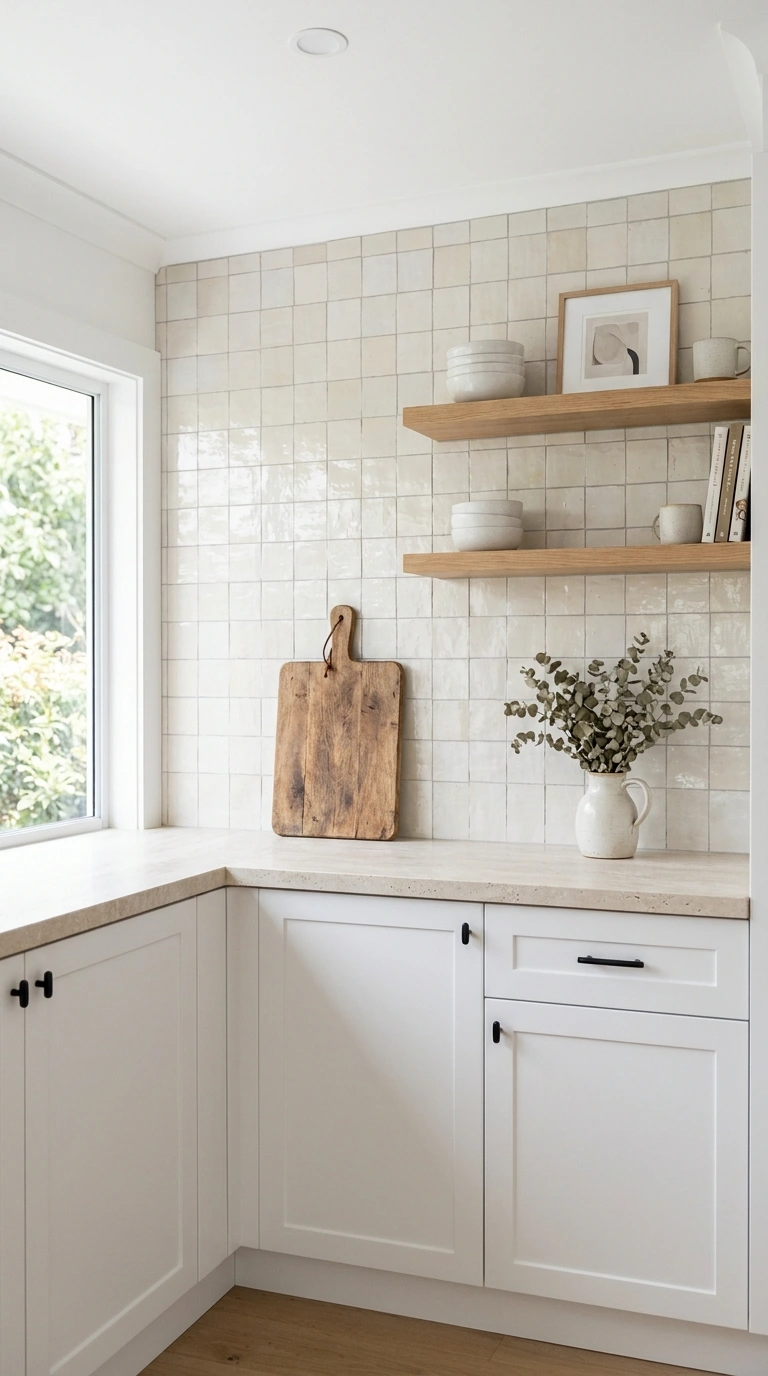
A backsplash in a pale color bounces light around a small kitchen instead of absorbing it. Glossy white subway tile is the reliable choice, but a soft cream zellige tile adds handmade texture without darkening the room. Run the tile all the way from counter to the bottom of the upper cabinets, and if you have open shelves, run it right up to the ceiling. That unbroken vertical line makes the wall look taller. Use a grout color close to the tile color, white or light gray, because dark grout draws a grid that visually cuts the wall into small squares. Peel and stick tile is a real option for renters now, and the good ones look convincing from a few feet away. Keep the counter below it mostly bare so the tile has room to show. A single wood cutting board leaned against the backsplash is all the styling this wall needs.
10. Toe Kick Drawers
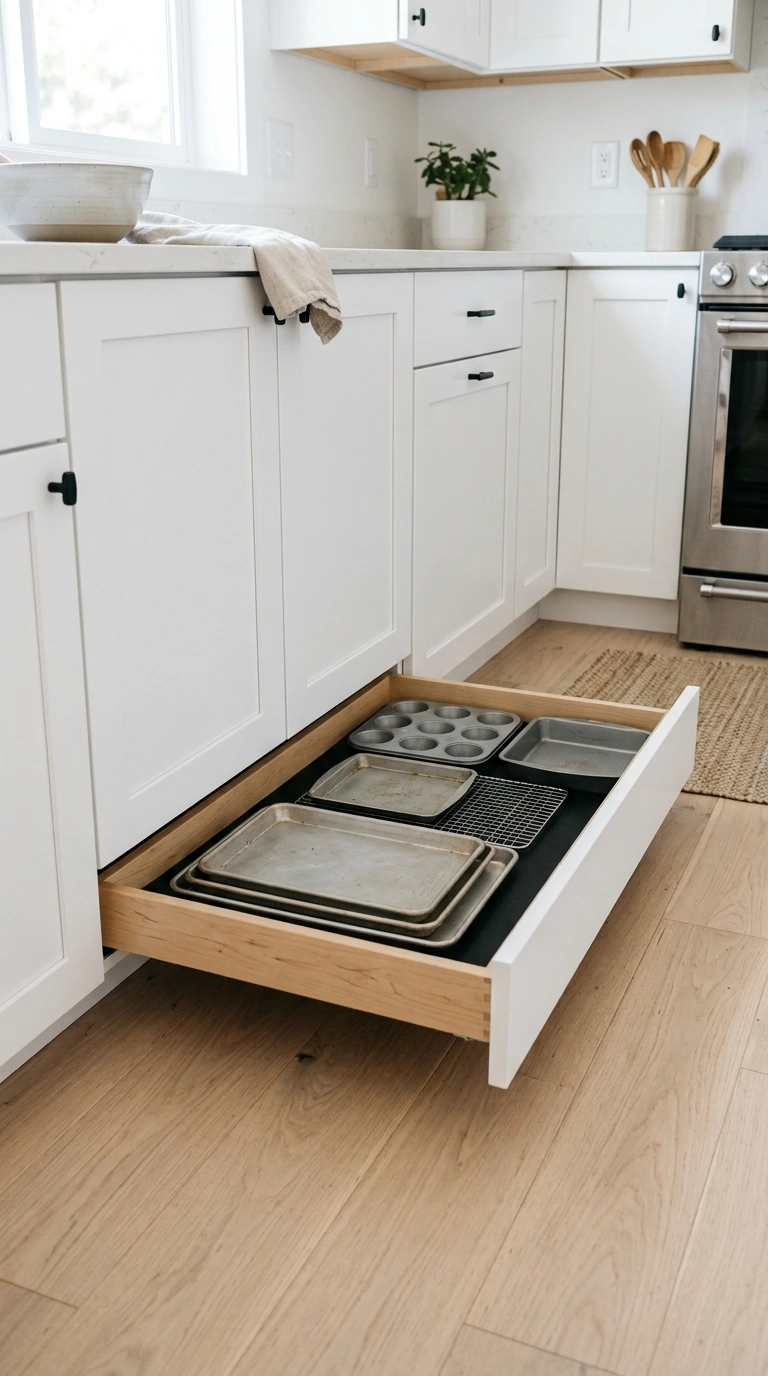
The four inch gap under your base cabinets is storage you already paid for and never used. Toe kick drawers slide into that space and hold flat items beautifully. Think baking sheets, muffin tins, cooling racks, placemats, pet bowls, or cleaning cloths. You can buy ready made toe kick drawer kits sized to standard cabinet widths, and most install with a screwdriver in under an hour per drawer. Choose a front panel that matches your cabinet color so the drawer disappears when closed. Push to open hardware is the cleanest option since you avoid adding handles at floor level where feet catch them. Line the inside with a thin rubber mat so items do not slide every time you open it. In a kitchen under one hundred square feet, two of these drawers can hold everything that used to be crammed into your most awkward corner cabinet. It is hidden storage that costs you zero visual space.
11. Mini Bar Counter
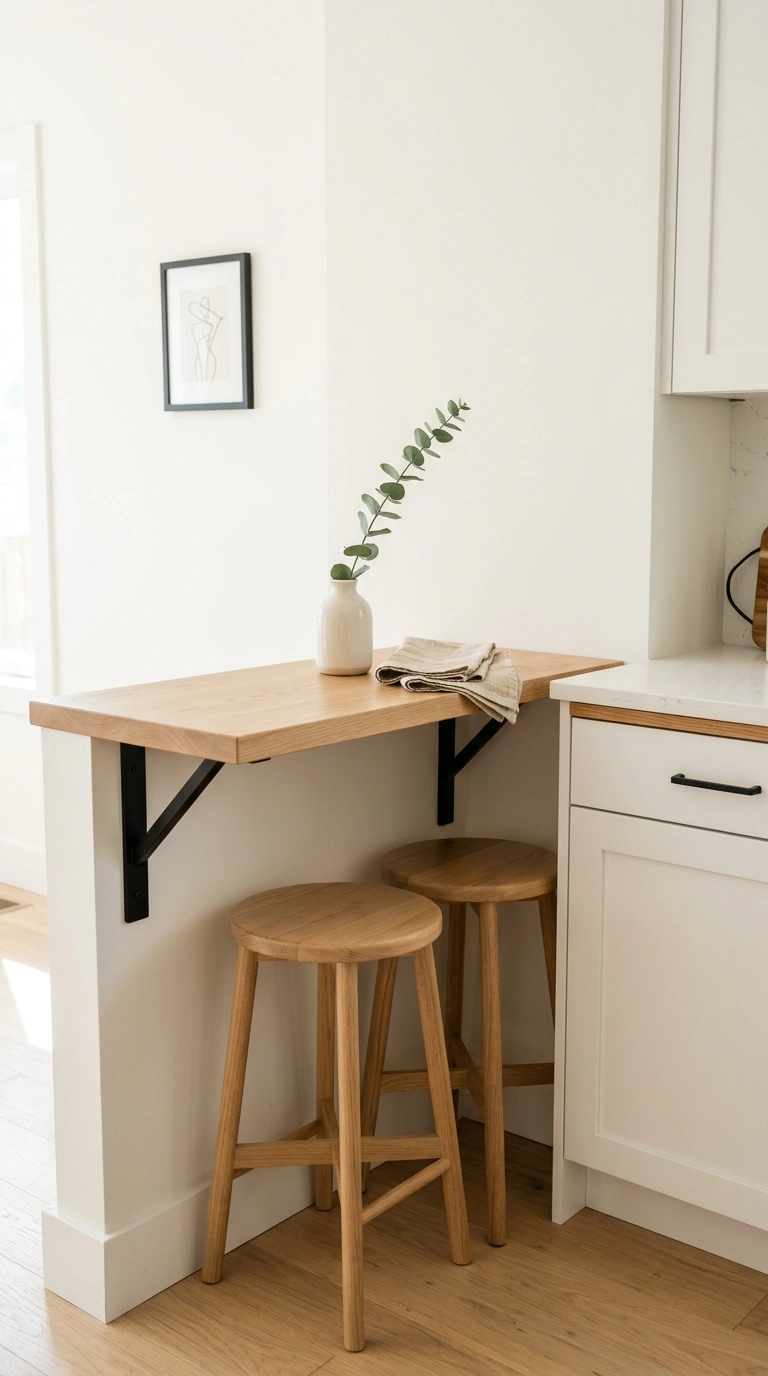
A slim counter extension turns a mini kitchen into a place people actually sit. Attach a twelve inch deep wood ledge along the end of your cabinet run, or along a half wall that separates the kitchen from the living area. Support it with two angled steel brackets or a single slim leg at the outer end. Set the height at thirty six inches to match your counter, or forty two inches for a proper bar feel. Two backless stools tuck fully underneath so the walkway stays clear. Butcher block or a solid oak board works well because the wood tone softens all the hard surfaces around it. Style the counter with one small vase, a stack of two linen napkins, and nothing else, since clutter on a narrow surface reads as mess instantly. This is the spot for morning coffee, for a kid doing homework while you cook, and for a friend keeping you company.
12. Glass Front Cabinets
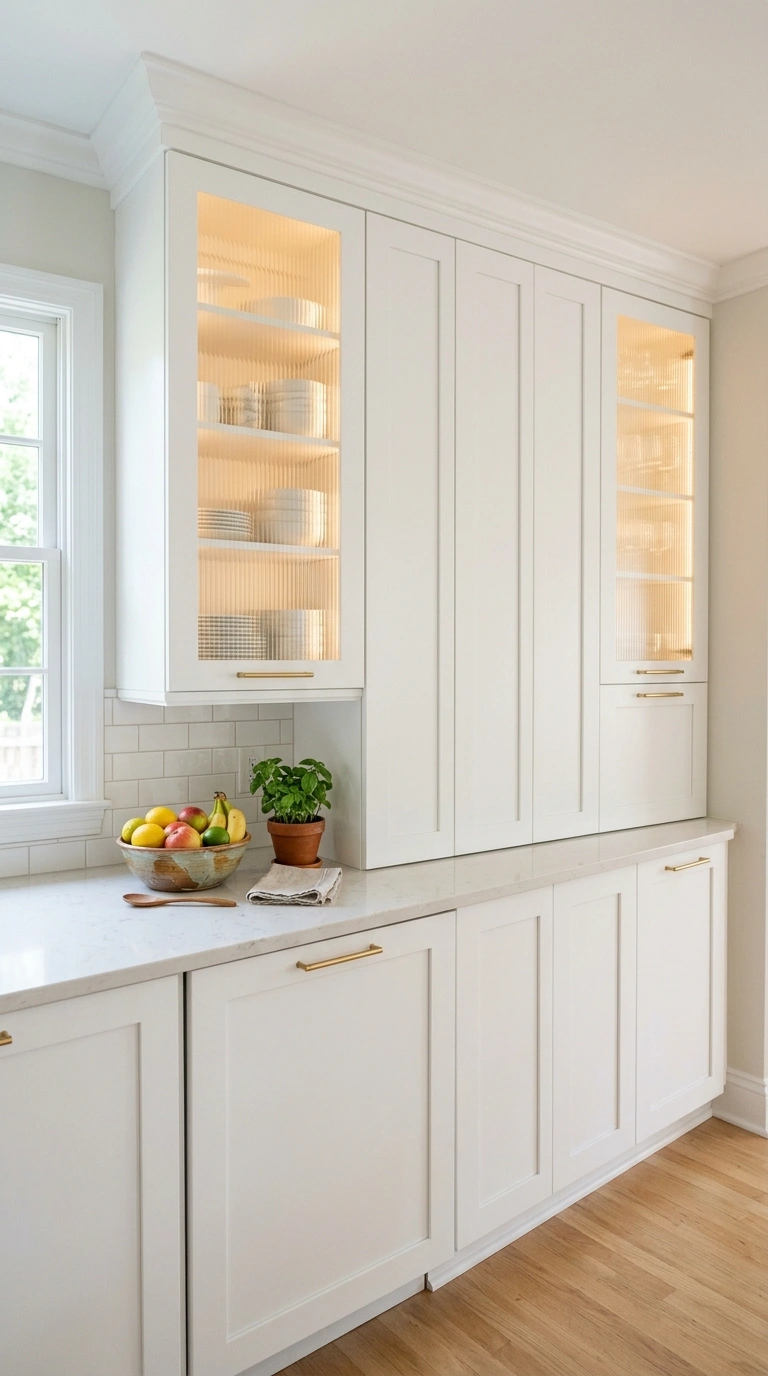
Swapping two solid cabinet doors for glass fronts adds depth without removing any storage. Your eye travels past the door and into the cabinet, so the wall stops feeling like a flat block. Clear glass suits neatly stacked white dishes and clear glass jars. Reeded or fluted glass is the better pick if your shelves are a little chaotic, because it blurs the contents while still letting light through. You can often retrofit existing doors by routing out the center panel, or buy replacement doors sized to your cabinet boxes. Paint the inside of the cabinet a soft warm white so the interior looks finished, and add a small puck light inside the top if you want a glow at night. Choose one or two cabinets for this, not all of them. Placing the glass fronts at either end of a run creates a symmetrical look that feels designed rather than random.
13. Hanging Pot Rail
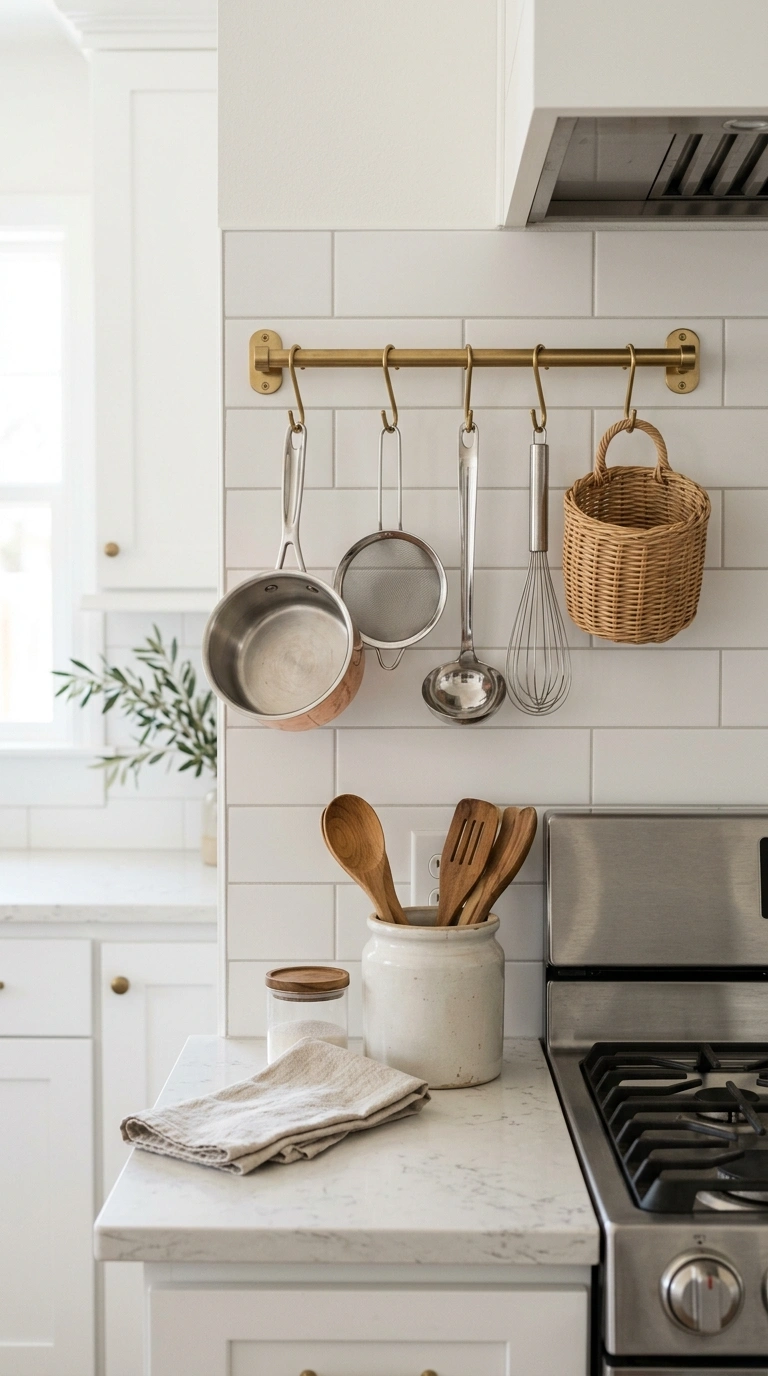
A metal rail mounted on the backsplash wall holds far more than it seems. Install a twenty four inch rail about sixteen inches above the counter, then hang S hooks along it. Your two most used pots, a colander, a ladle, a whisk, and a small basket for sponges all live there instead of eating drawer or cabinet room. Stainless steel rails look crisp in a modern kitchen, and unlacquered brass develops a warm patina that suits older homes. Keep the spacing even and hang items by size so the line looks calm rather than cluttered. Do not overload it. Six to eight pieces is the sweet spot on a rail this length. Mount it into studs or heavy duty anchors since cast iron is no joke. If your kitchen is very narrow, place the rail on the wall beside the stove rather than directly behind it so handles do not sit over open flames.
14. Sliding Pantry Door
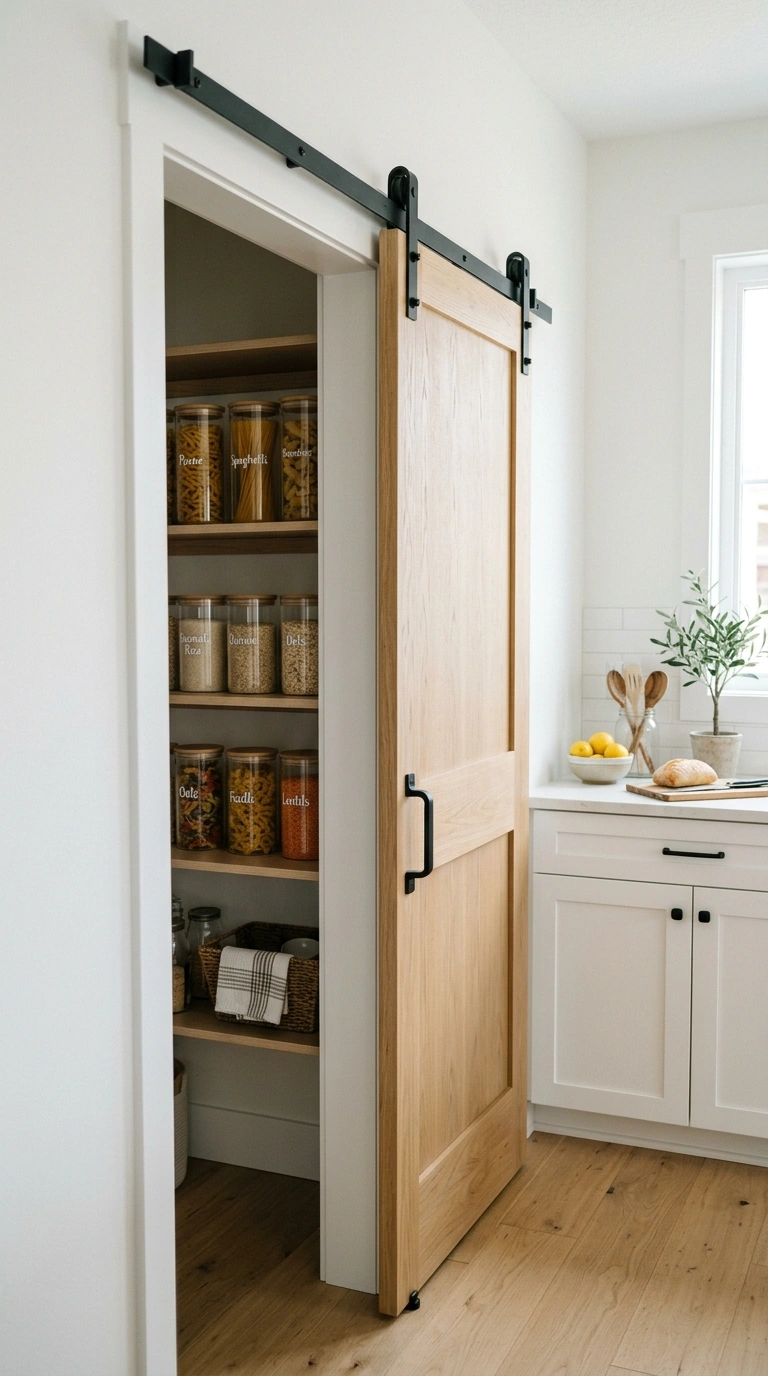
A swinging pantry door needs about two feet of clear floor to open, which a mini kitchen usually cannot give. A barn style sliding door or a pocket door removes that problem. Sliding hardware mounts above the opening and the door glides along the wall. Choose a slim door in a warm wood tone to add texture, or a painted door in the same color as your cabinets so it blends in. Matte black track hardware keeps the look modern rather than rustic. Inside the pantry, use narrow shelves around eight inches deep so nothing hides behind anything else, plus one deeper shelf at the bottom for appliances. A door mounted spice rack makes use of the inside face. If you cannot fit a sliding panel, a floor to ceiling curtain in heavy linen on a black rod does almost the same job for far less money and looks soft against hard kitchen surfaces.
15. Built In Microwave Nook
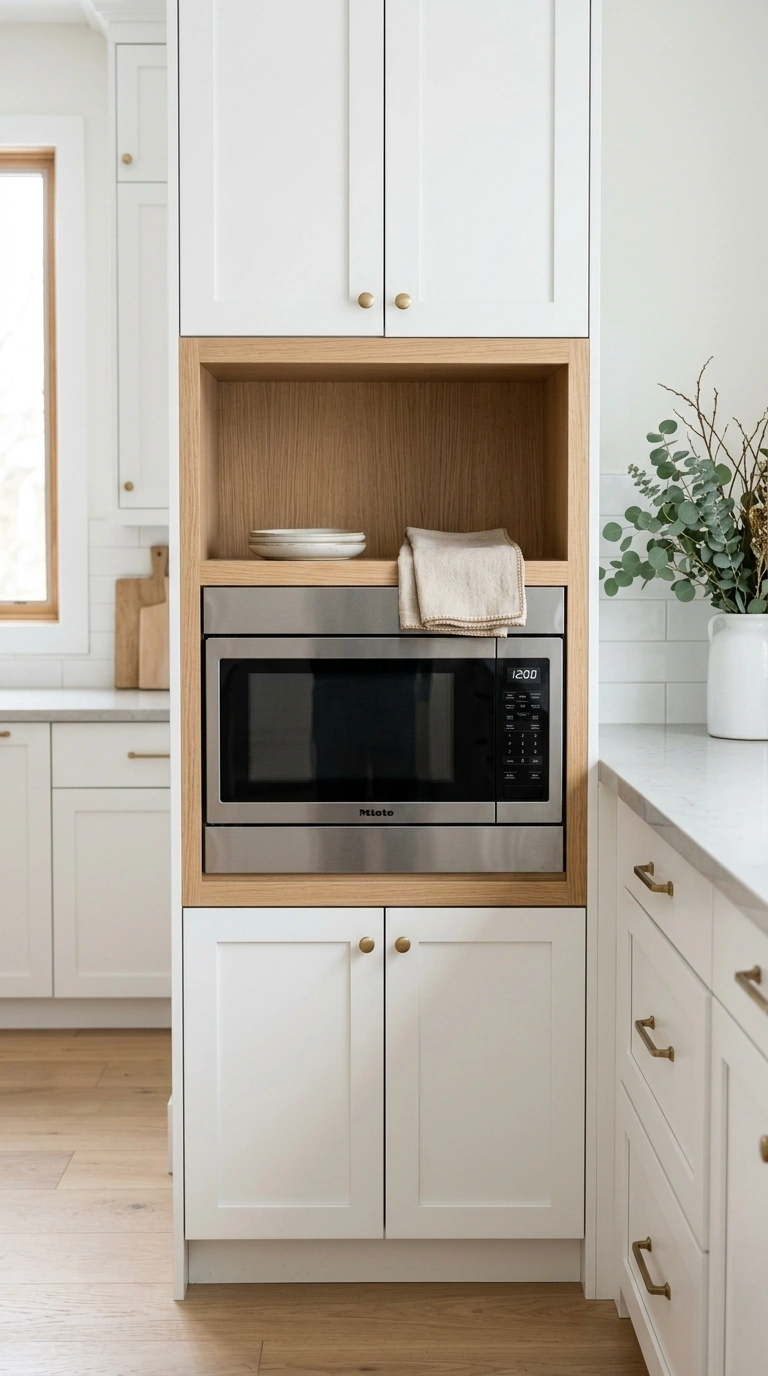
A microwave sitting on the counter steals the most valuable surface in the room. Moving it into a dedicated nook gives that space back. The easiest version is a cutout inside your existing base cabinet, sized to your microwave with two inches of clearance on all sides for airflow, with an outlet run to the back. If you have open shelving, build a simple box shelf at chest height and set the microwave inside it. Line the nook with the same wood as your shelves so it looks planned. Leave a little room above for a narrow tray or a stack of small plates. Keep the microwave itself in a finish that matches your other appliances, since mismatched metals in a small room stand out fast. Once it is off the counter, you gain roughly two square feet of prep space, which in a mini kitchen is close to doubling what you had.
16. Floating Wood Counter
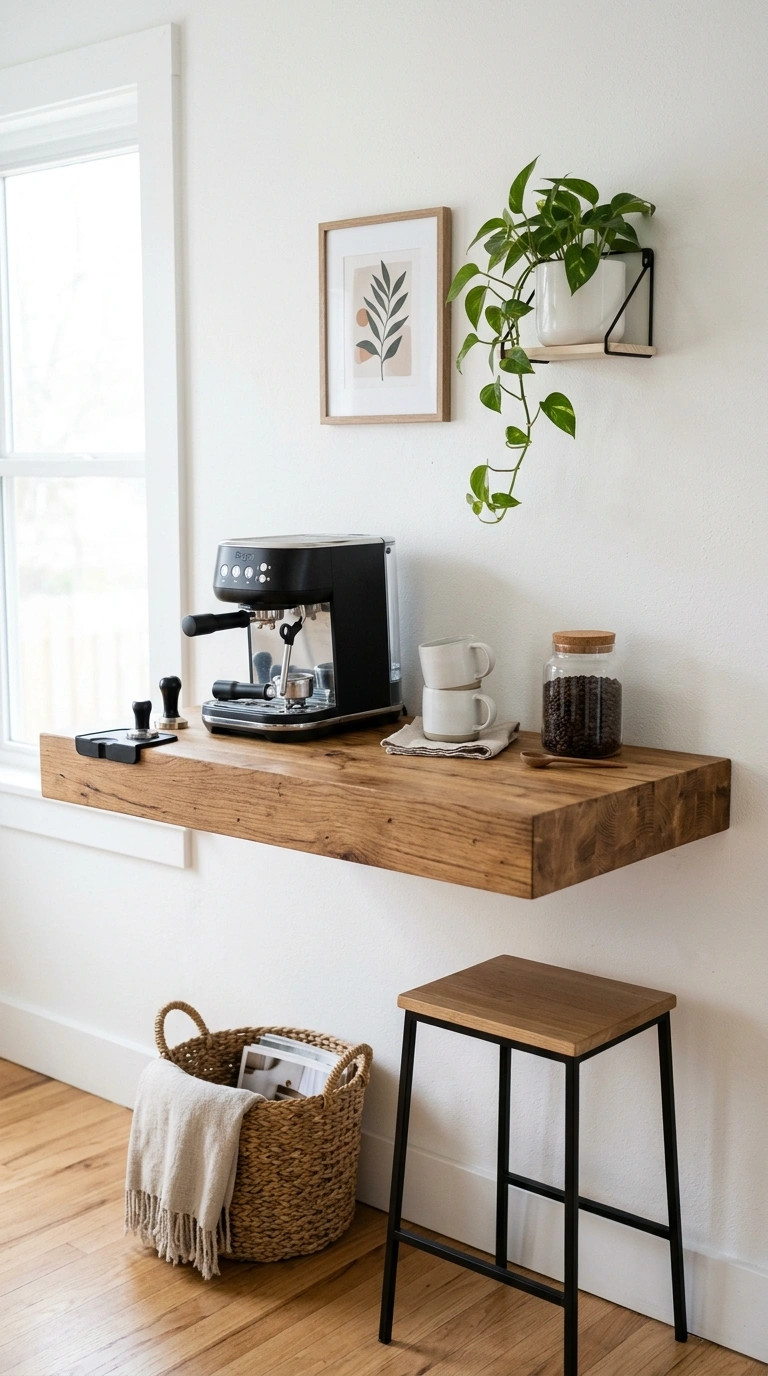
A floating counter is a slab of wood mounted directly to the wall with no cabinets underneath. It suits the narrow end of a kitchen, a nook beside the fridge, or a wall where a full cabinet run simply will not fit. Use a solid butcher block or a thick oak board at least an inch and a half thick, and mount it on concealed steel brackets so nothing interrupts the clean line. Depth of sixteen to twenty inches is enough for coffee making, plating, or a small appliance station. The open floor underneath is what makes this work. Seeing the floor run continuously under the counter makes the room read larger than it is. Tuck a woven basket or a slim stool in that space. Finish the wood with a food safe oil and re oil it twice a year. It is a warm, simple surface that fits where cabinetry cannot.
17. Undershelf Basket Storage
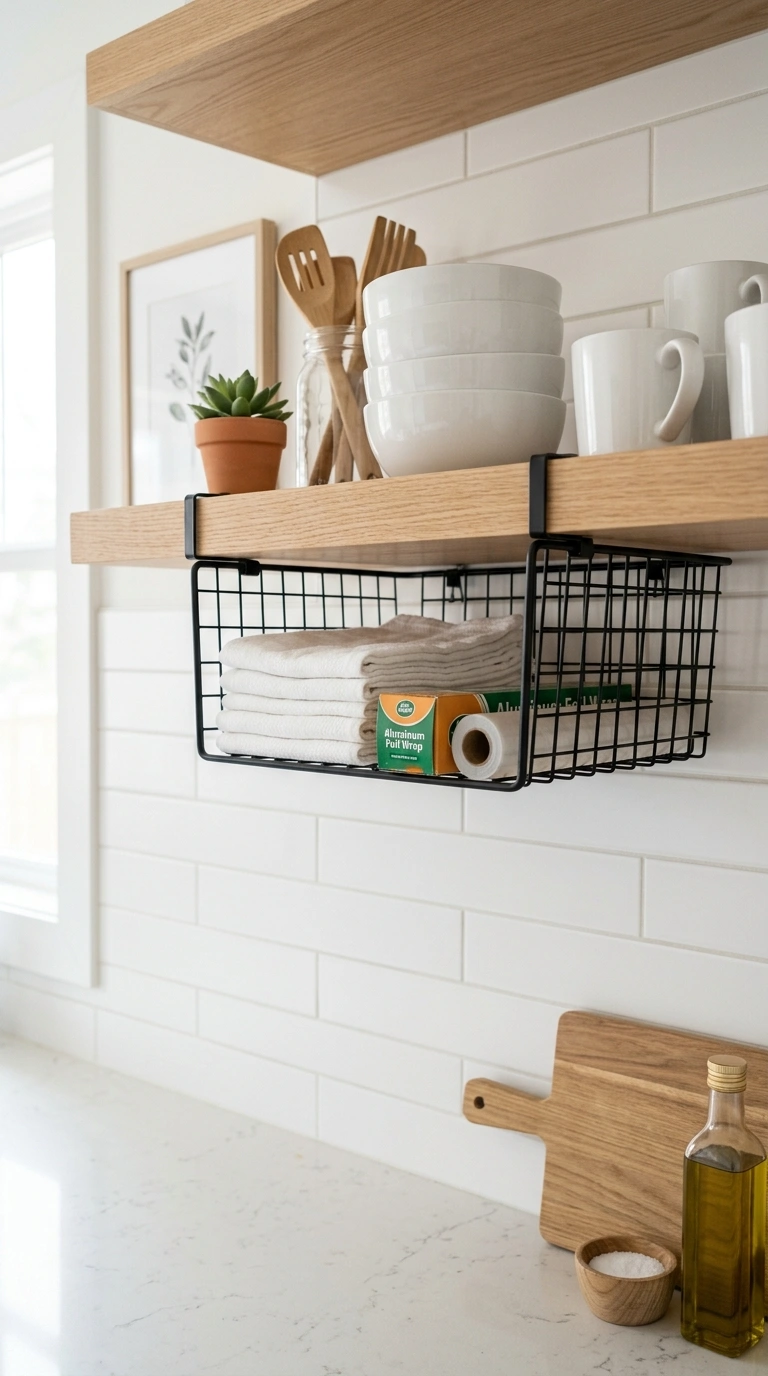
Wire baskets that clip onto the underside of an existing shelf double your storage without any drilling. They slide on in seconds and hang in the empty air below each shelf. Use them for napkins, foil boxes, tea bags, dish towels, or small produce like garlic and shallots. In a cabinet, they turn one tall shelf into two usable layers. On open shelving, a black wire basket adds a bit of structure and keeps loose items from looking scattered. Measure your shelf thickness before buying, since most clip on baskets fit boards up to about one inch. Chrome baskets work in a bright modern kitchen, while matte black suits warmer wood shelving. Keep the contents of each basket to one category so you always know where to look. This is a five minute, low cost change, and it is one of the few storage upgrades a renter can take with them when they move.
18. Bright Window Sill
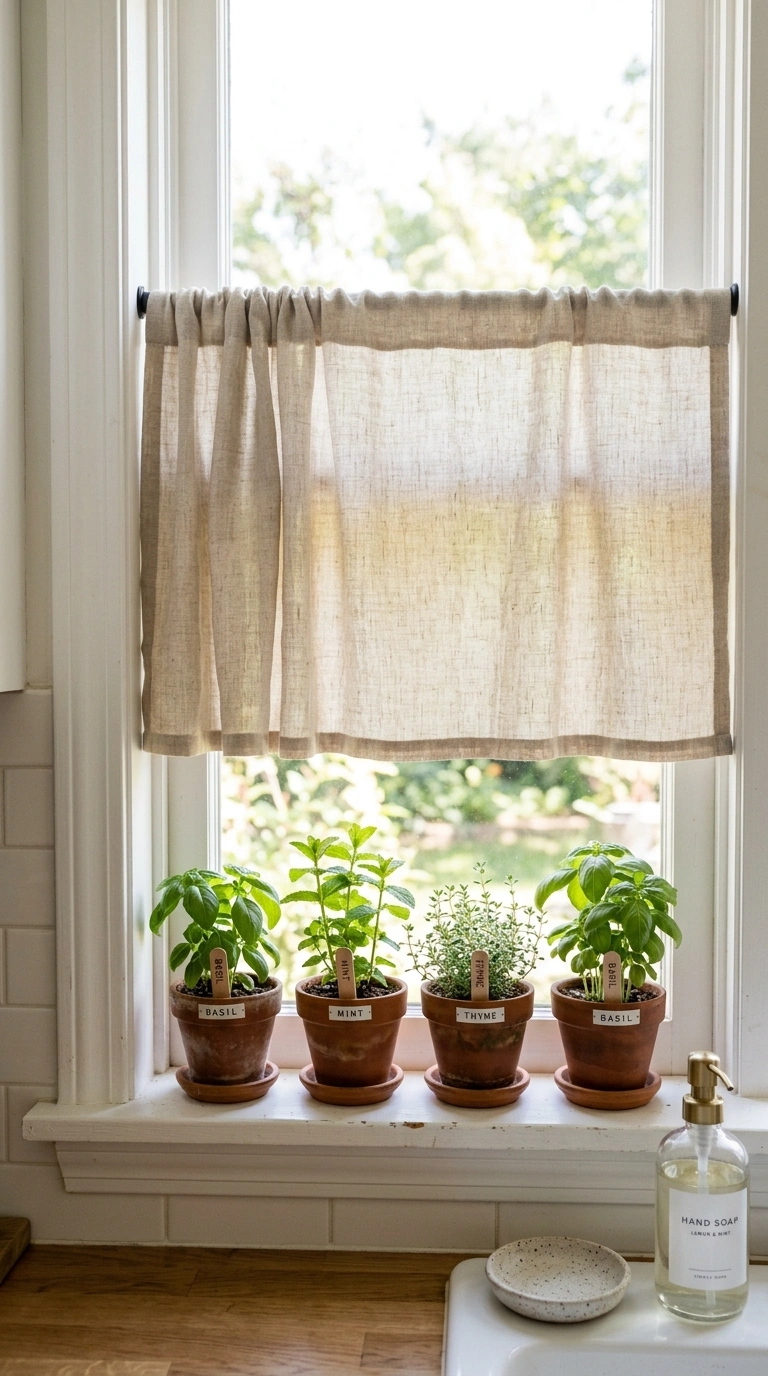
If your mini kitchen has a window, the sill is free real estate that most people leave empty or pile with clutter. Treat it like a small styled shelf instead. A row of three or four small terracotta pots with herbs, basil, mint, and thyme, gives you fresh flavor and a bit of green against the glass. If the sill is deep enough, add a low ceramic dish for rings and a small glass bottle for dish soap decanted from its plastic packaging. Keep everything under six inches tall so the window still lets light through, since blocking the glass defeats the whole point. Skip curtains here or use a simple linen cafe curtain on a slim rod that covers only the bottom half. A light colored sill painted the same white as the trim keeps the area feeling clean. Wipe it weekly, since sills collect more dust than you would expect.
19. Round Bistro Table
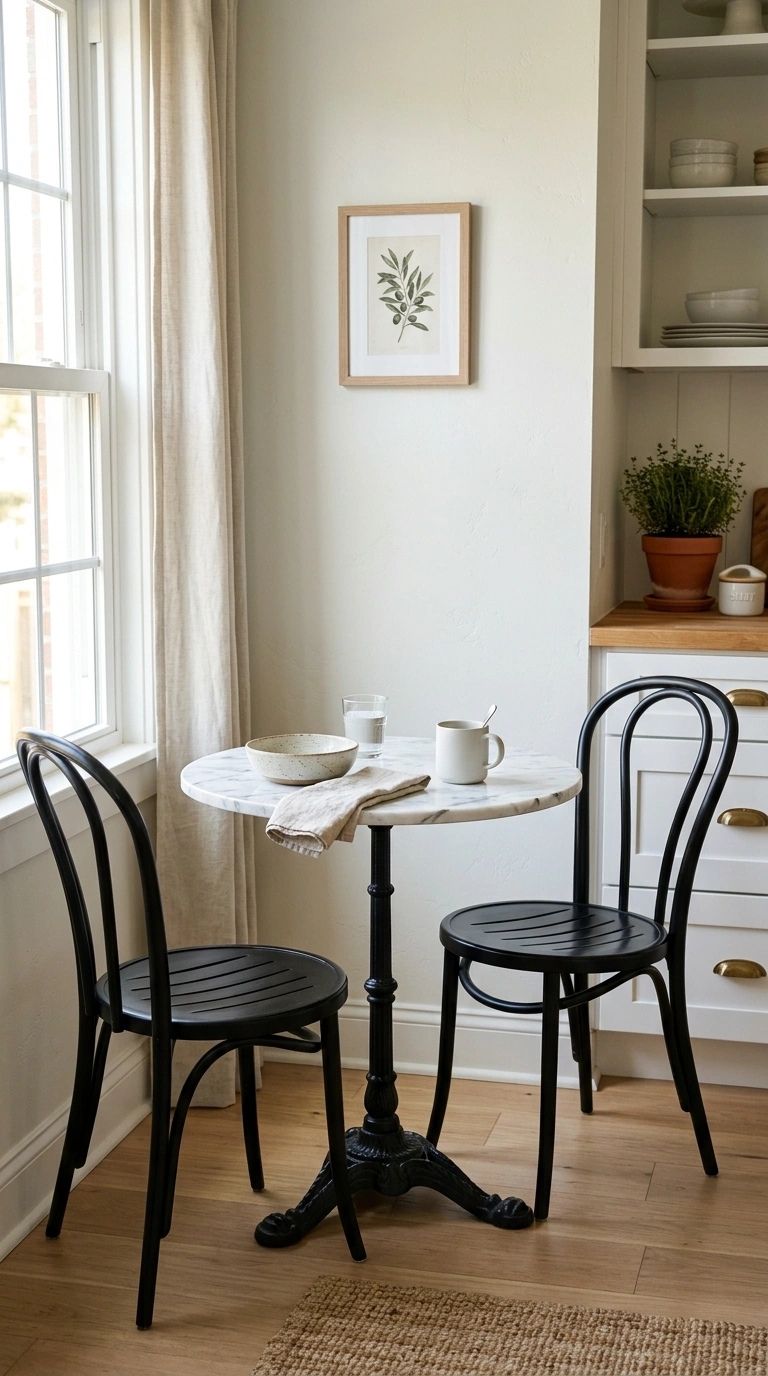
In a tight kitchen, a round table beats a square one every time. There are no sharp corners to bump, and the curved edge lets people walk past it more easily. A twenty four to thirty inch round bistro table with a pedestal base is ideal, because a single center column means no table legs to straddle when you pull a chair in. Set it in a corner or against a wall rather than floating in the middle. Two lightweight chairs, bentwood or metal cafe style, keep the visual weight low. A marble or light stone top reflects light, while a wood top keeps things warm. Style it with one small plant or a shallow bowl and leave the rest bare so the surface stays usable. If floor space is truly tight, pick a table with a folding top that drops down and stores flat against the wall between meals.
20. Single Wall Layout
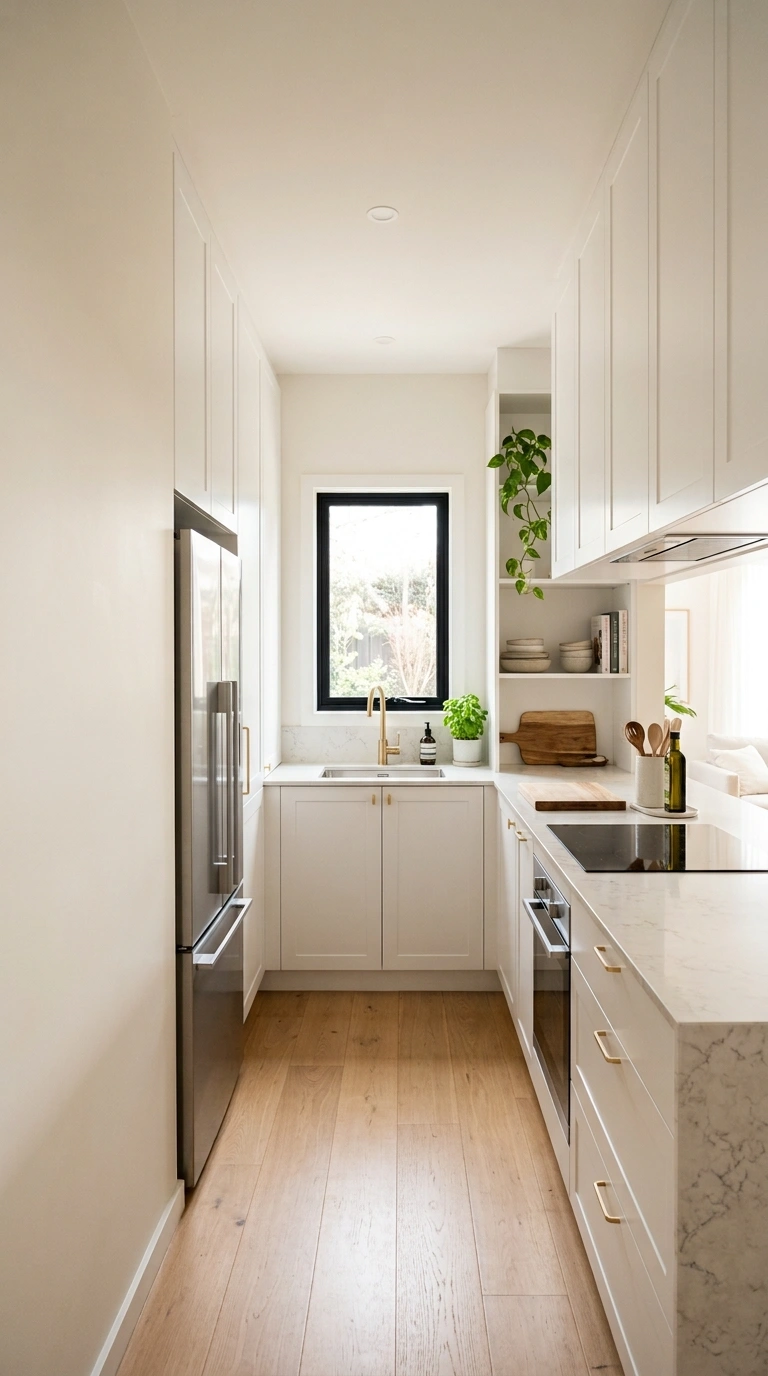
Putting everything on one wall is often the smartest move in a very small space. Sink, cooktop, and fridge line up in a row with counter between them, and the opposite wall stays completely free. That free wall can hold a table, a tall pantry, or nothing at all, which makes the room feel open. Aim for at least eighteen inches of counter on either side of the sink and twelve inches beside the cooktop so you have real working room. Run the upper cabinets to the ceiling to gain a full extra shelf and avoid the dust ledge on top. Keep every cabinet front the same color to make the wall read as one calm surface rather than a set of boxes. A continuous counter in a light tone strengthens that effect. This layout works especially well in studio apartments, basement suites, and narrow galley rooms under seven feet wide.
21. Tall Narrow Pantry
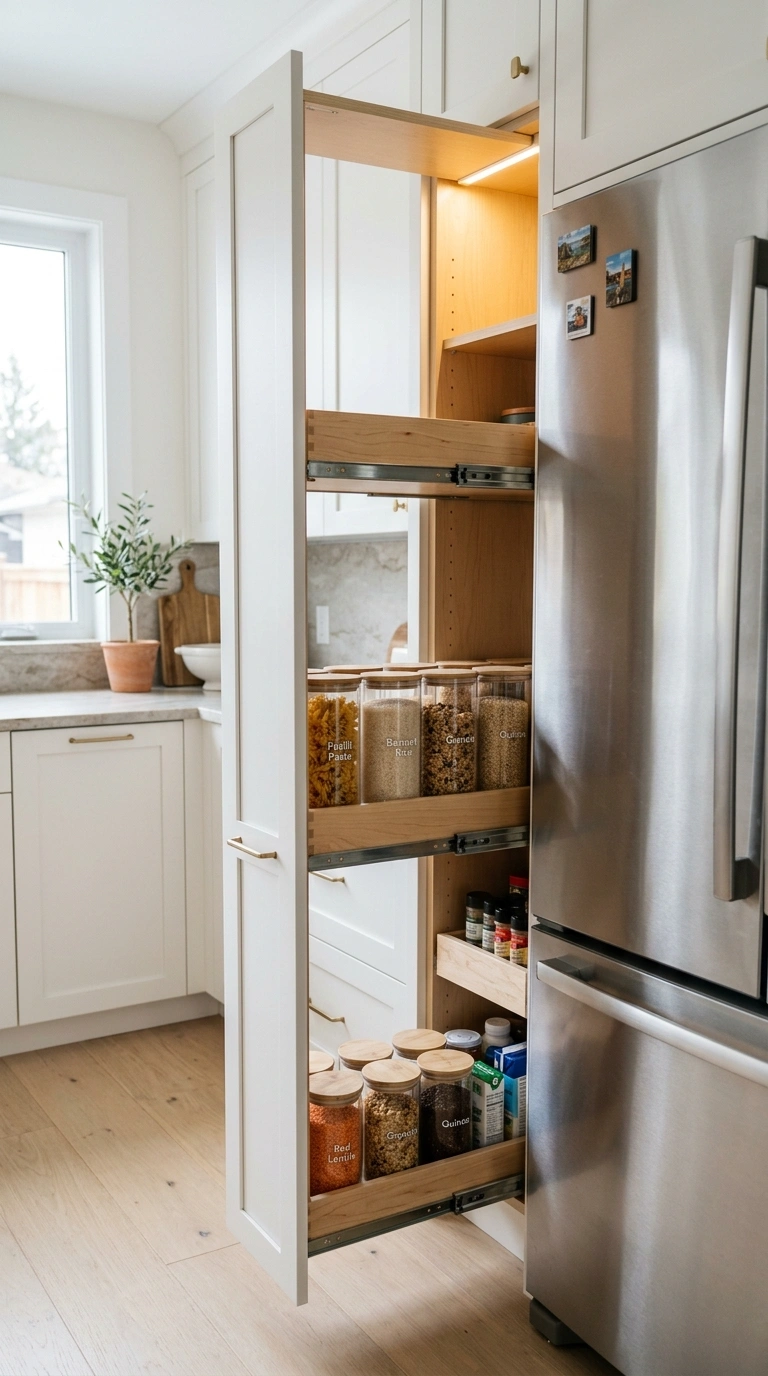
A pantry cabinet only twelve to fifteen inches wide but running floor to ceiling holds a shocking amount. Pull out shelves are what make it work, because you slide the whole shelf toward you and see everything at once instead of digging behind cans. Fit it into the gap beside the fridge, at the end of a cabinet run, or in a leftover pocket of wall near a doorway. Use clear or matching containers for pasta, rice, and cereal so the inside looks calm every time you open it, and keep heavy items on the lower pull outs. Add a small light strip inside the top. On the outside, matching the pantry door to your cabinet color makes the tall shape recede into the wall, while painting it a contrasting shade turns it into a feature piece. Either choice works, as long as it is deliberate rather than accidental.
22. Mirror Backsplash Panel
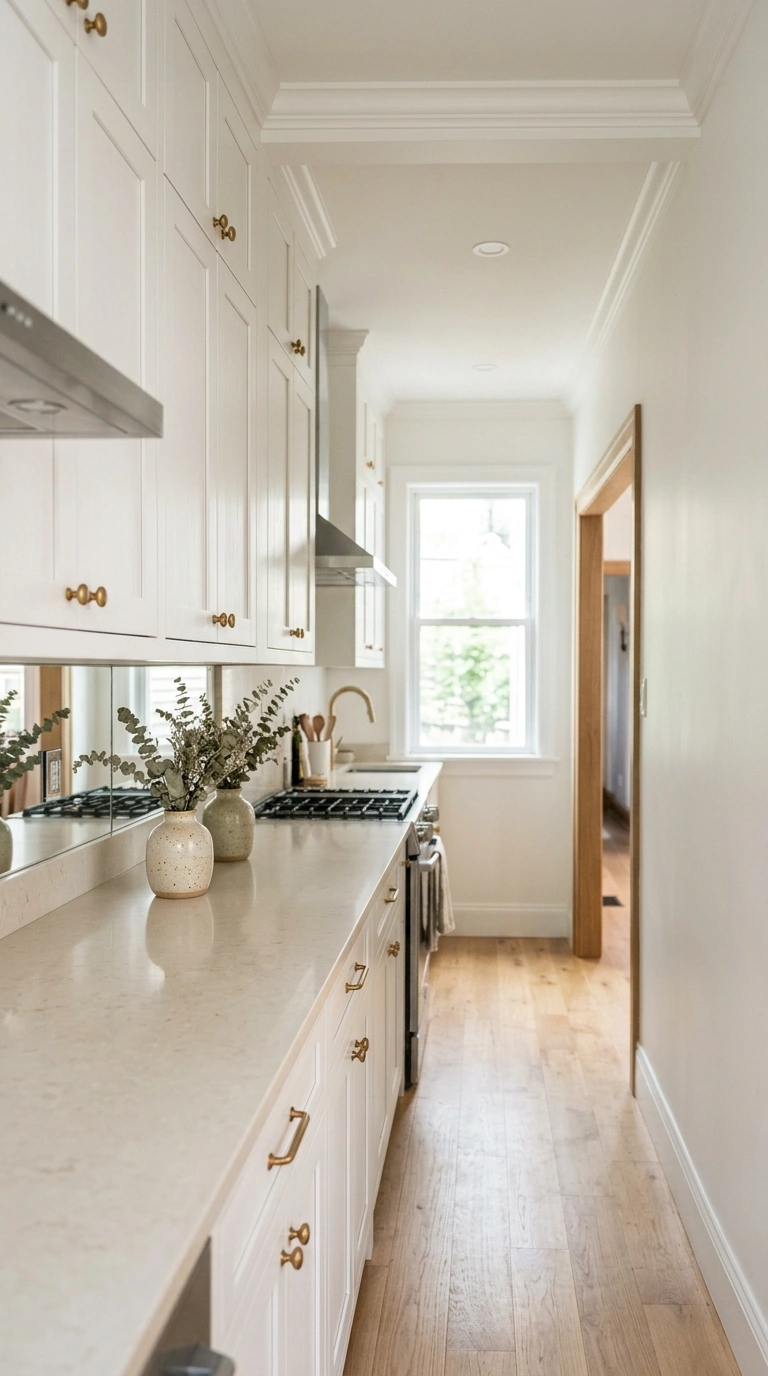
A mirrored panel behind the counter is the boldest small kitchen trick and also the most effective. It reflects whatever is across from it, usually a window or a doorway, and that reflection reads as extra depth. Use antiqued mirror glass rather than plain mirror if you are nervous, since the softly clouded surface hides fingerprints and water spots and looks far less like a bathroom. Have it cut to fit the exact run between counter and upper cabinets and mount it with mirror adhesive plus a thin trim strip at the edges. Avoid placing it directly behind a gas cooktop for heat reasons. Keep the counter in front almost empty so the reflection stays clean. Pair it with warm brass hardware and a light stone counter for a look that feels polished rather than flashy. In a windowless galley kitchen, this single panel does more than any paint color could.
Frequently Asked Questions
What is the best layout for a very small kitchen?
A single wall layout usually works best in rooms under seven feet wide, because it keeps one full wall free for a table or storage. If your room is L shaped, a corner sink with counter running down both sides gives you two usable work zones instead of one cramped strip.
How do I get more counter space without remodeling?
Move the microwave off the counter, add a rolling cart that parks against a wall, and use a wooden board over the sink or an unused burner as temporary prep space. Those three changes alone can add two to three square feet of working surface for very little money.
Are open shelves practical in a small kitchen?
Yes, as long as you store daily use dishes on them. Items you touch every day never sit long enough to collect grease or dust. Keep decorative pieces to a minimum and stick to one or two colors so the shelves look tidy instead of busy.
What color should I paint a tiny kitchen?
Soft white, warm cream, and pale greige all reflect light well and keep the room feeling open. If you want color, put it on the lower cabinets only and keep the uppers and walls light, which keeps the visual weight near the floor.
Can renters use these mini kitchen ideas?
Most of them, yes. Rolling carts, clip on baskets, stick on lighting, magnetic strips with removable adhesive, peel and stick backsplash, and freestanding pantry cabinets all come out cleanly when you move. Save the tile, cabinet, and plumbing changes for a home you own.
Final Thoughts
A small kitchen does not need a full renovation to work well. It needs a few honest decisions about what you use daily and where it should live. Pick two or three ideas from this list, try them for a week, and see what actually helps. The rest can wait.